Introduction
Following the previous assignment, our next task for this module is that we have to create a production piece in the form of a video (both narrated and unnarrated) to show our technical skills and forward thinking ability in emerging technologies. Keeping a lot of the same principles in mind that were portrayed in the previous blog post whilst creating this new piece will be essential, principles in terms: of colour consideration and user comfortability, ethical and other morally concerning possibilities addressed etc. At the bottom of this page you will find both a narrated and unnarrated video of my final production piece.
Project Theme and Research – Initial Ideas
My first thought for the project is what theme I will be choosing. I decided to go with my second idea of a Lovecraftian inspired temple exploration scene. I feel that by pursuing this idea opens so much new possible variation in terms of colour and even animation. My initial idea was to use an underwater piece and use a lot of light and subtle audio cues to alert the user to the points of interest around them. Where as with this theme it can be used to much greater effect and sound a lot more intense to those listening. Especially as this genre is typically seen as quite dark, I really want to incorporate an almost ethereal feel to the scene, and really make the user feel that they are somewhere that is otherworldly.
In terms of looking to create the world scene, I decided to really look deep into the lore and style of Lovecraft to really see how I can make it my own and not look to copy any of his previous works. With the genre having a large alien and demon influence, an early thought of the shape of my world came into question. Ruins do not have to be a single building, which is an extremely important point for me to factor in, using more shapes to create a much more interesting world.
In the initial investigation into the theme, a large design philosophy that I noticed was that there are a lot of monolithic style buildings and structures that look to be shrines to deities. These structures often varied in shape, some being more rounded, some being triangular and some even warping from top to bottom. This would mean that when bringing these to life in Maya I could really make use of some extrusion and transform tools to create some extremely interesting shapes.
Delving slightly deeper into the mythos, I wanted to find any descriptions of how the landscapes were roughly described to avoid clashing with any fan works of art I may see online. The following description will be a large aid in how I structure my scene: “Cosmic majesty, irrational architecture, structures without any apparent purpose” (Coulthart, J.).
These initial building blocks allowed me freedom to design some objects and rooms that would fit the theme of which I am aiming to create. Having to factor in the user’s perception, I cannot have pieces that are too large or too close, therefore I will need to put in a decent amount of distinguishable detail from a fair distance.
My Theme – How is it Futureproof?
Lovecraftian horror has been a giant part of fiction for over a century. H.P Lovecraft, the creator of the related stories and genre itself, started publishing his fiction works in 1917 after being influenced by the likes of Lord Dunsany and Edgar Allan Poe. (
Reference Images

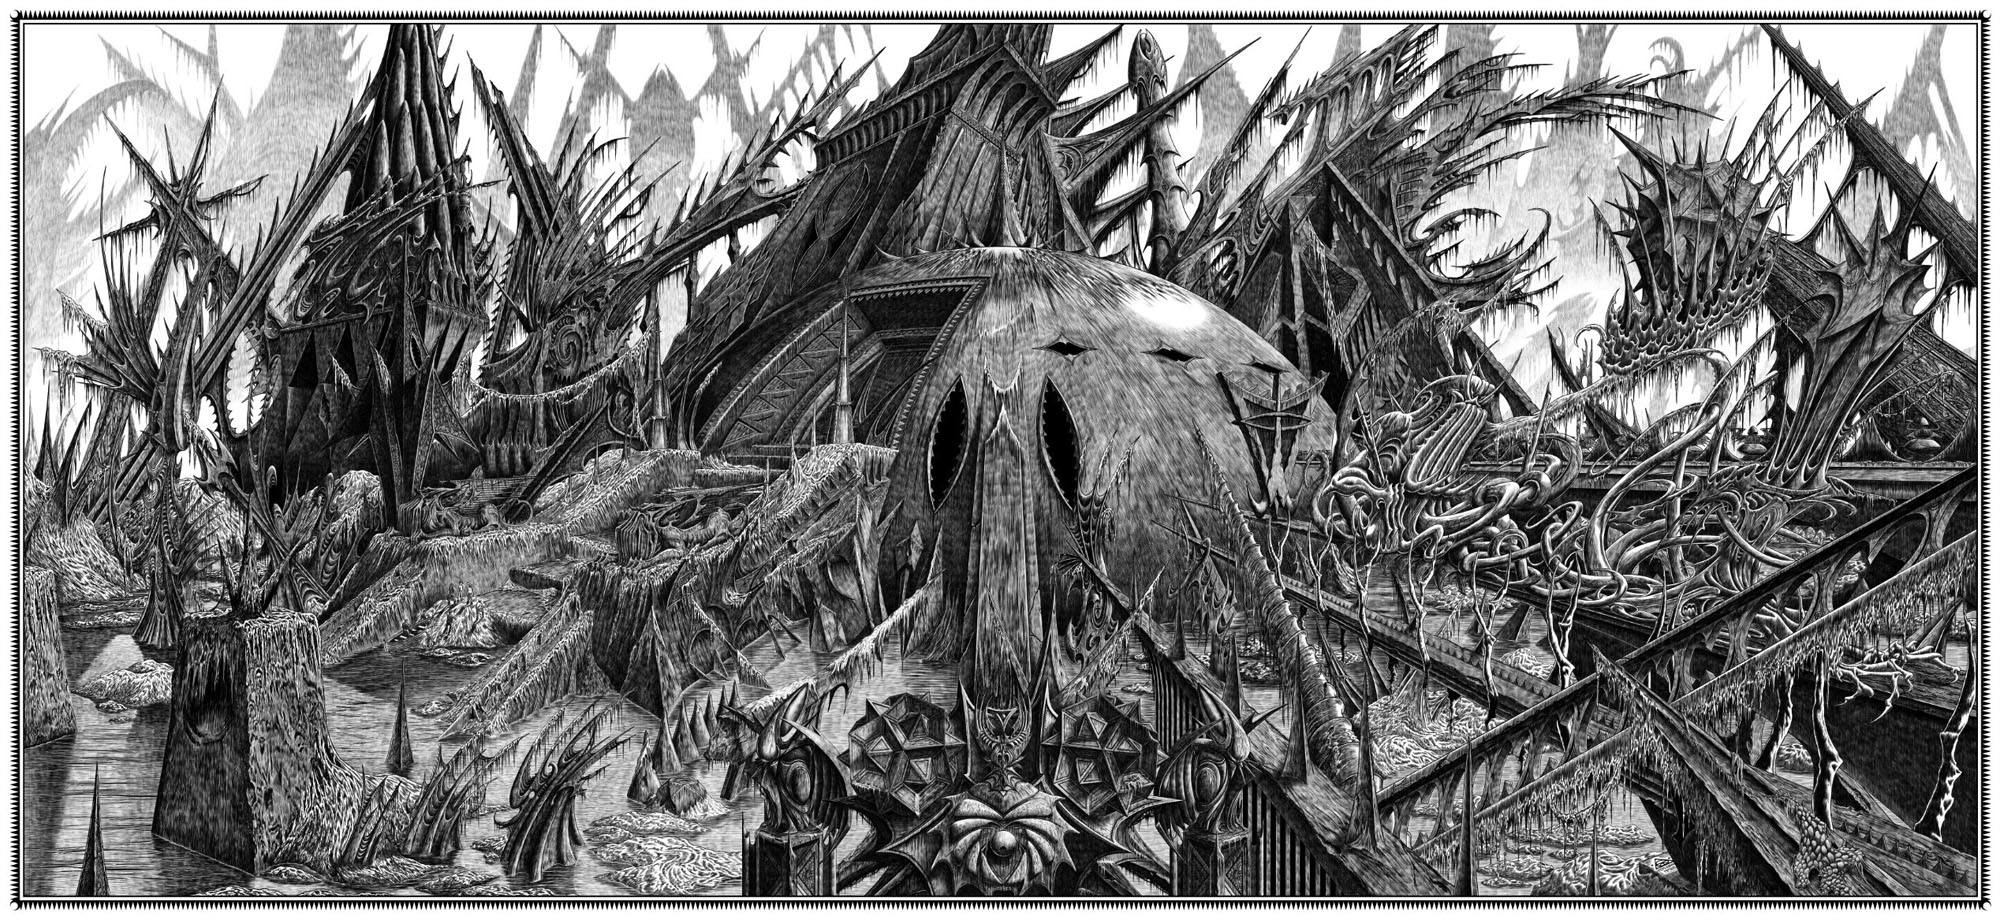
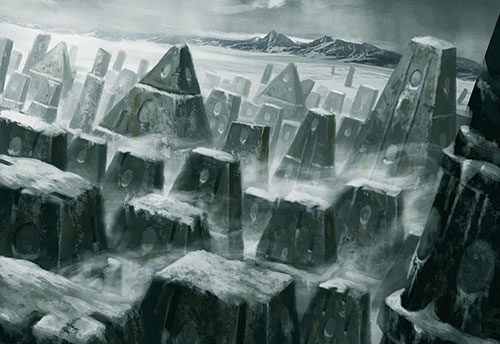
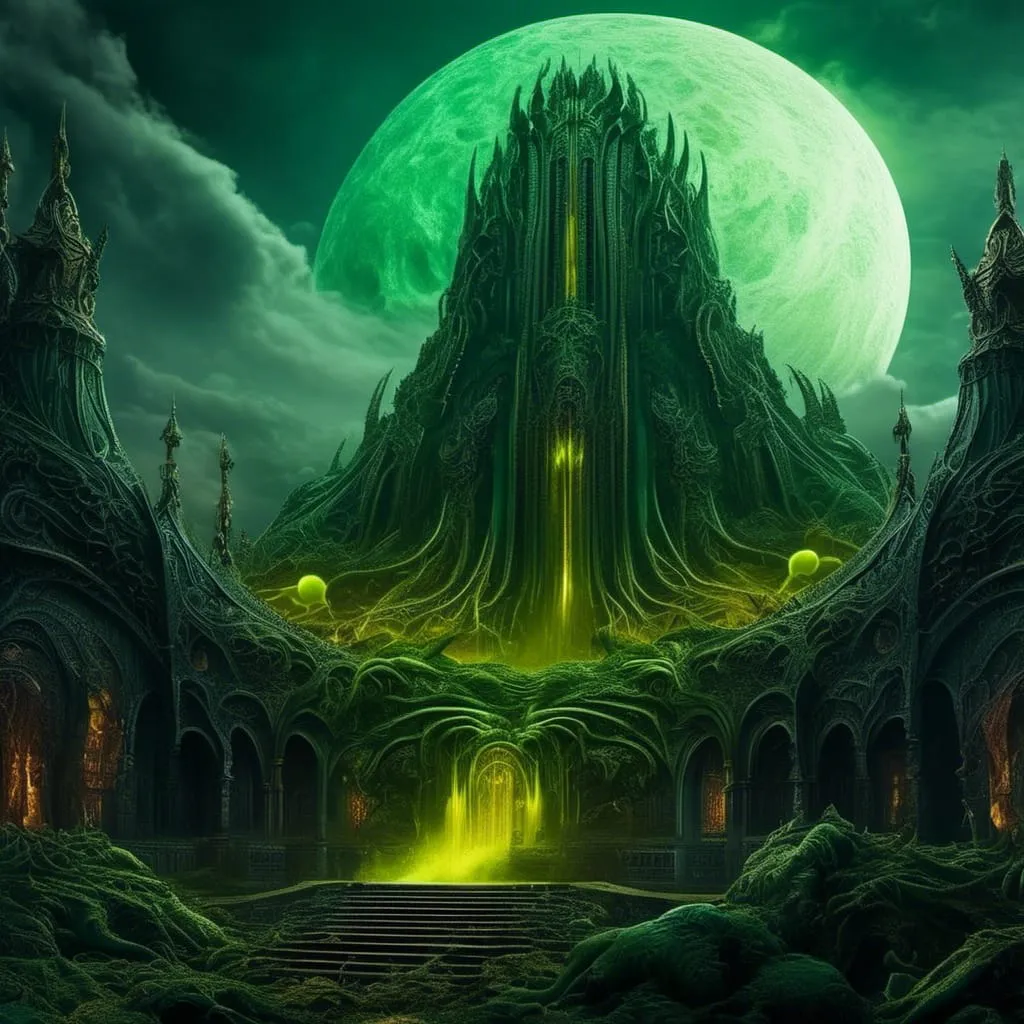
The above images show multiple different perspectives on how a popular city in the Lovecraft mythos is portrayed. Seeing as these are all depictions of the same location, it is curious as to how a genre can allow for so much variety in its appearance. They all range from being extremely minimalistic to extremely intricate with the details and shapes used to form the landscape.
I am personally more drawn to the middle image, with a more minimalistic approach, for a few major reasons. The main reason being is that it is much easier to follow the story of the piece without getting distracted by the almost excessive amount of shapes in your line of sight. With the piece being a 360 degree production, I think it more suitable for the user if the environment is minimalistic where it needs to be and allow details for them to discover for themselves.
Crafting a Brief Storyboard
Before making the piece, I wanted to create a story board for myself so that I had a more clear Idea in the direction I wanted the piece to go.
The scene will open in a rounded corridor. Unbeknownst to the user they are about to find a major discovery hidden in an unknown land. Infront of them stands a large unopen door blocking the passage. After a brief look around the immediate area, there will be nothing of notice help you proceed further, thus the user begins to turn back.
As the user is walking back however, the door slides open on its axis, revealing a pitch black room with the possibility of some ominous glows. The user will proceed forward into the room when the lights that were dormant will come alive with an otherworldly colour (a purple/blue most likely).
Entering the now lit has revealed an area akin to that of a shrine. However, instead of one major statue, you only notice smaller ones. Curious about what you are seeing, the user notices that everything in the room looks to be pointing towards the middle of the ceiling, so you naturally glance there yourself.
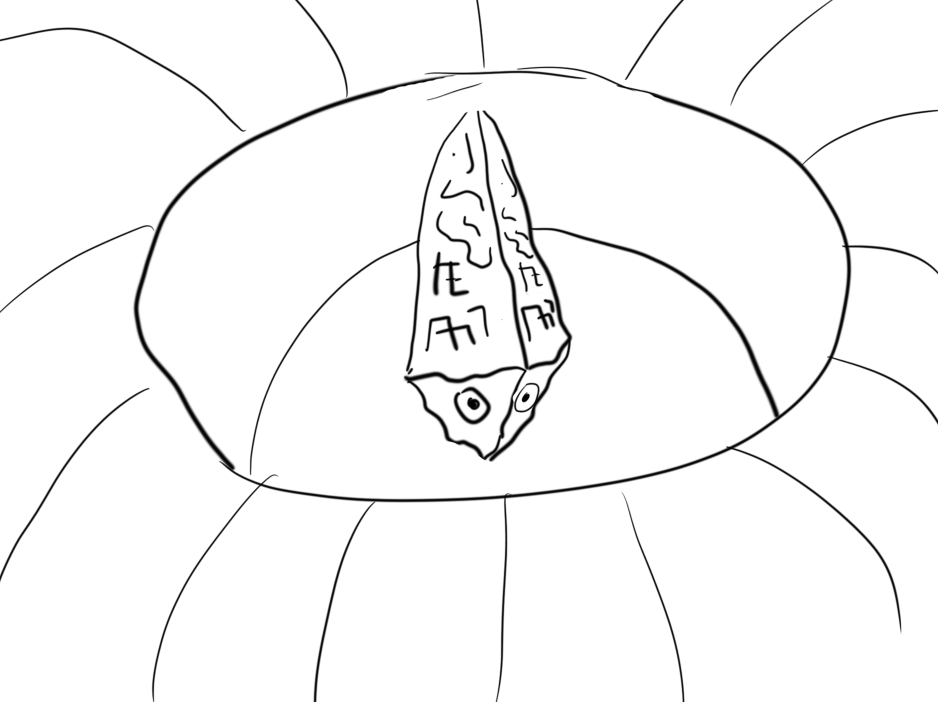
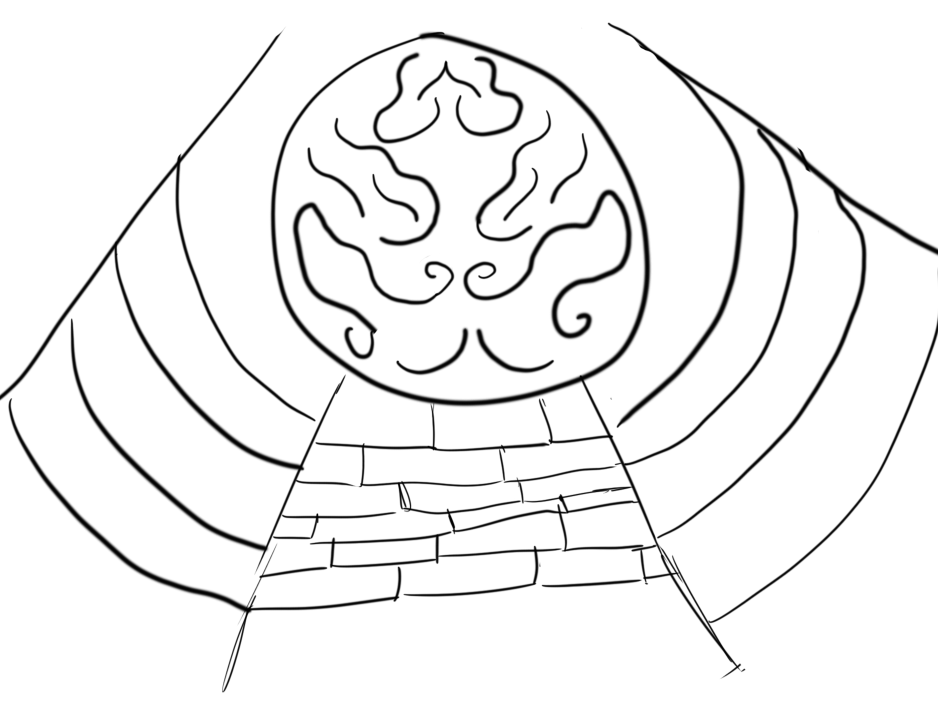
Your efforts reveal a large, floating obelisk in the skylight that seemingly went unnoticed before, that now captures your attention. Runes carved into the side in an incomprehensible alphabet and eyes scanning every direction litter this ancient stone. The user will also notice what seems to be the moon in the background of the obelisk, almost unimportant.
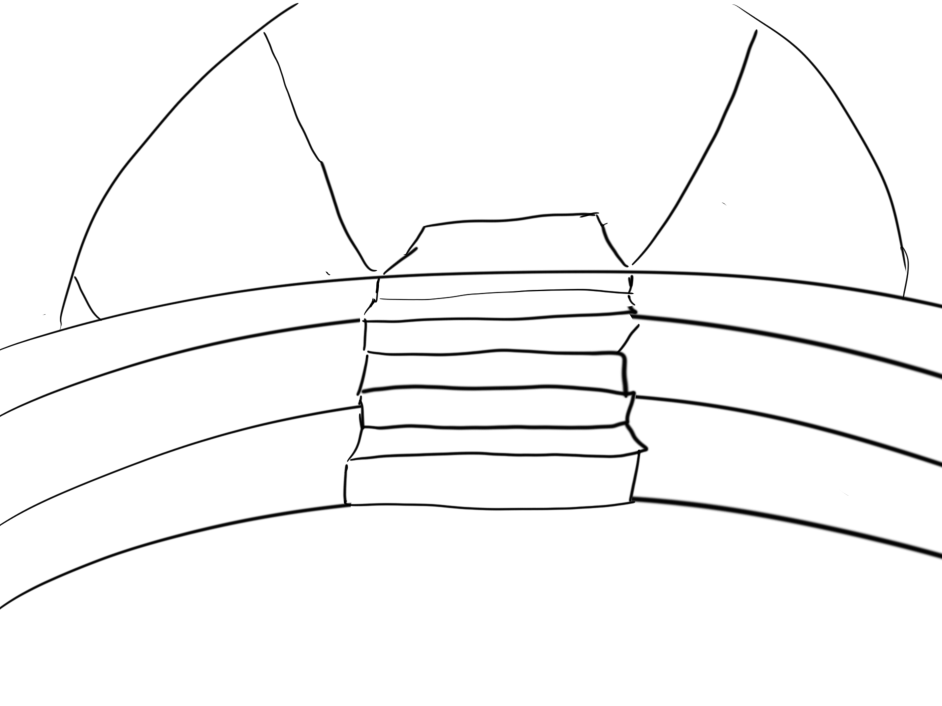
It is at this moment the structure starts to shift. Three layers of the walls start to peel downwards, almost as if bringing the user to life in this foreign world. At the sight of this the user will look to turn back, only to notice the door shut behind them. Returning their gaze back to the shifting wall will also reveal that the statues in the open space have also turned to wards you.
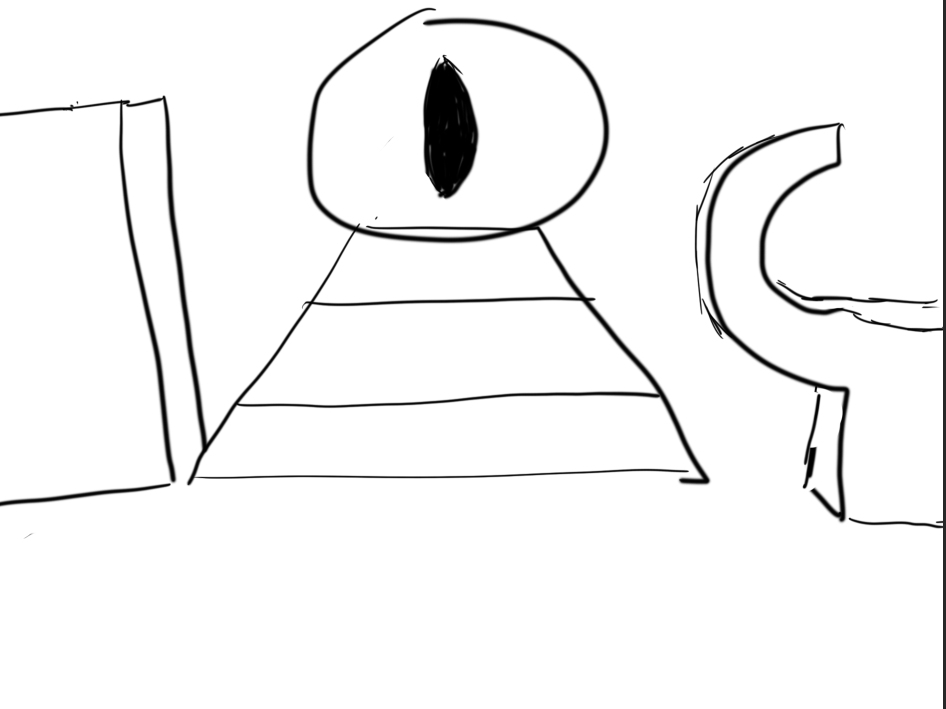
After seeing it clearly once the wall has gone, the user will notice that the orb in the skylight was no moon. It was in fact a large eye situated atop a large pyramid. Gazing down at the user, their vision will slowly blackout at the sight, which is where the scene will finish.
Creating the Scene – The Cave
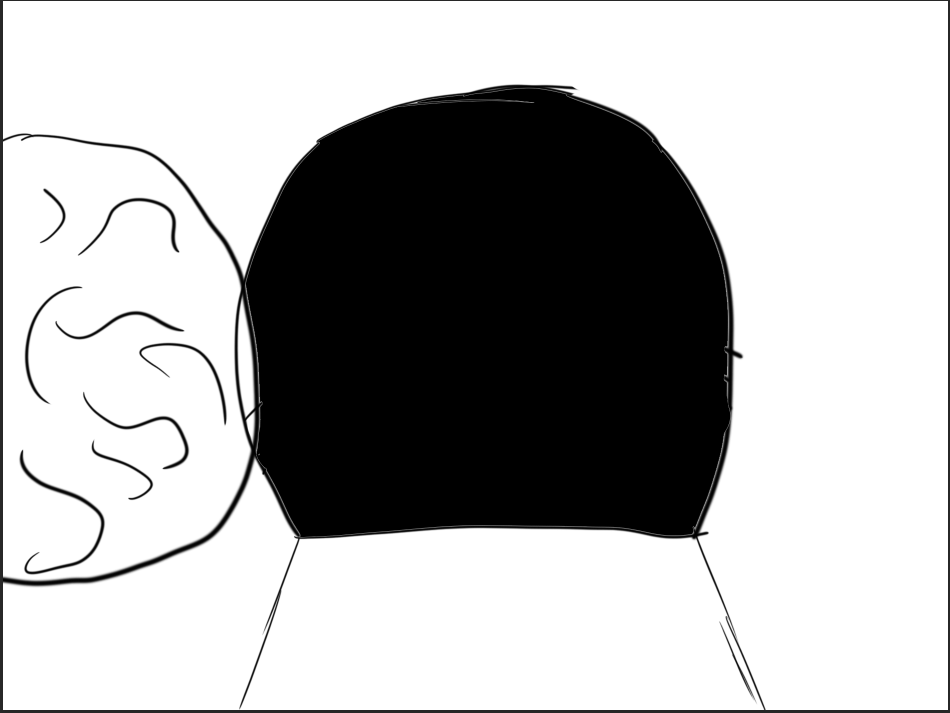
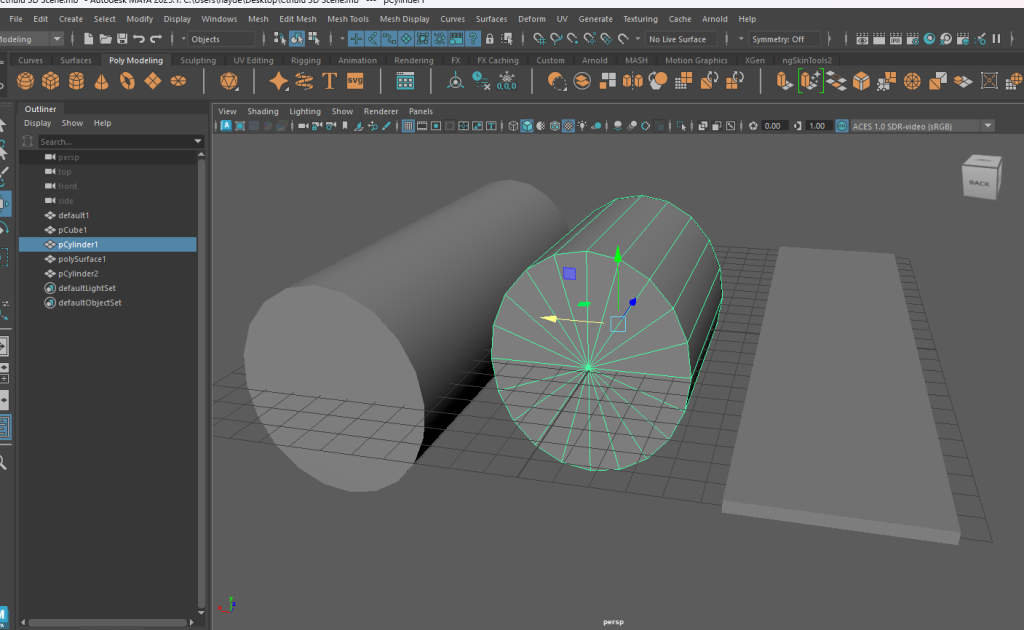
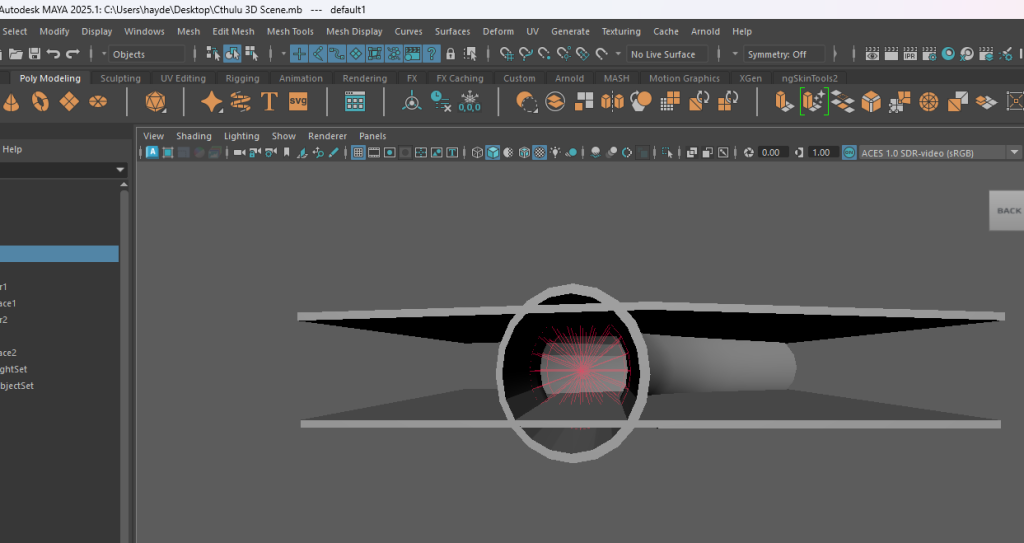
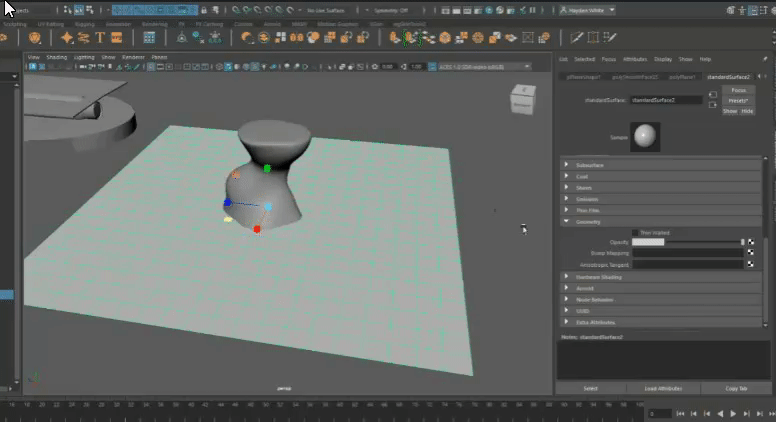
To start off the building of the scene, I wanted to focus the initially on the tunnel that the user’s point of view will start in. I wanted to keep things as simple as I knew how to, so I created two cylinders, and lined one slightly thinner inside the other. I would then use this as a boolean object to hollow out the larger cylinder, and add two elongated rectangular shapes to start with the initial definition.
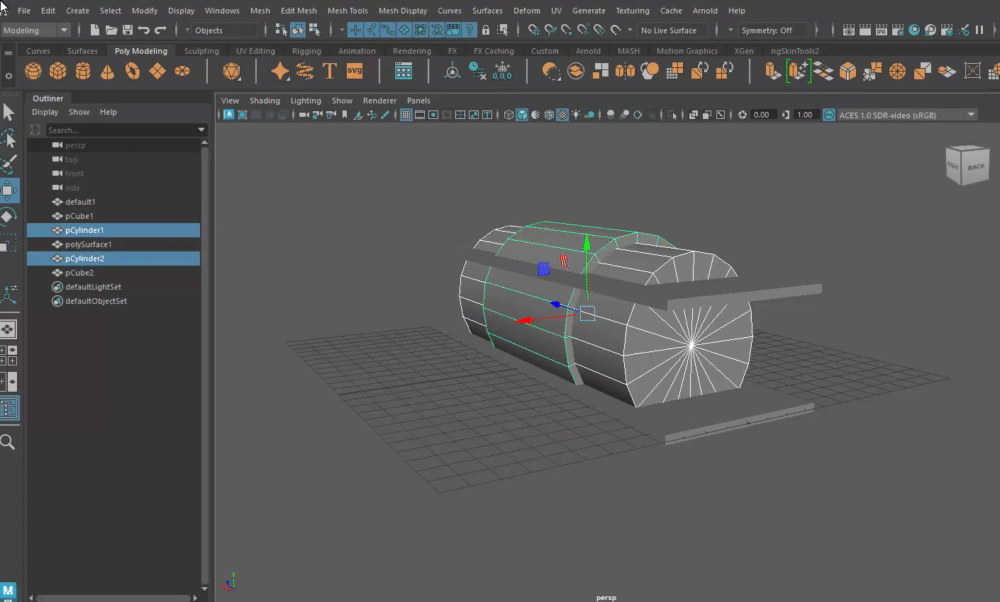
Now that I had the foundation for the hollow cave, it was time to shape it to how I wanted the piece to look. I extruded the cylinder so the cave had an S bend appearance that I intended to make fully visible but look blocked as to lead to more anticipation of where the user is.
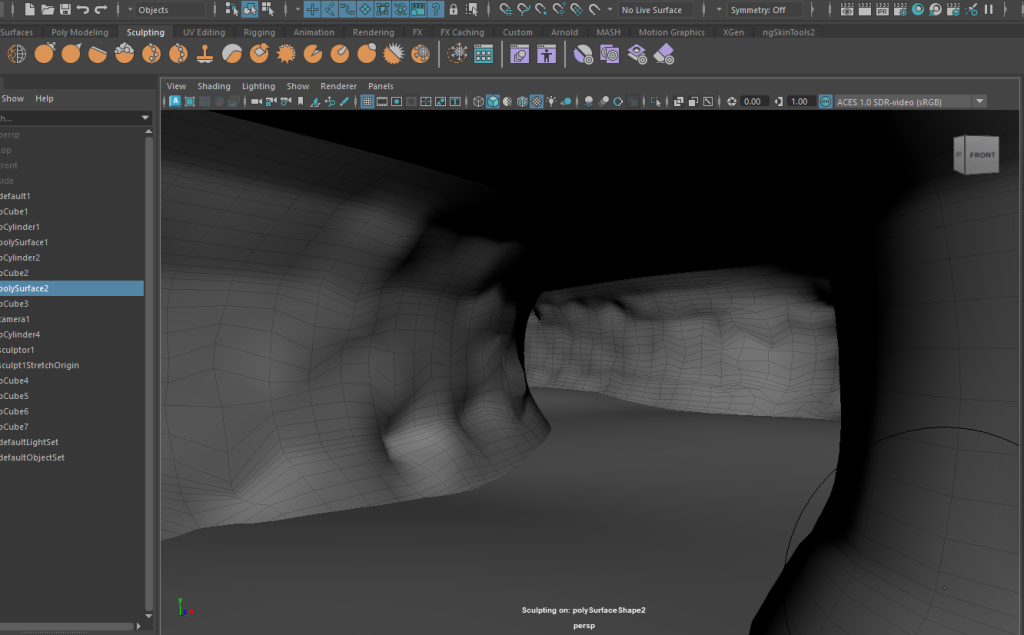
If the cave was just completely round throughout the entire piece, it would look no where near as interesting for the user. So I smoothed the mesh to increase the total amount of faces present, and added some natural looking texture to the wall. To do this, I used the grab tool in the sculpting section and manually pulled parts of the mesh to create a more layered appearance. Whilst quite a simple method of doing so, I believe the effect is extremely effective. In parts where the mesh started to break and layer back into itself, I used the level and smooth tools to make sure that it all kept good composure and that a texture would sit nicely on it later on.
Creating the Scene – The Door
With the cave complete, it was time to fit the large door that I conjured up a design for. To do this, I used a very similar method of sculpting that I used on the cave interior. I used a cylinder which I mad quite thin but large, so that I could sculpt easier with my graphics tablet and not make as many mistakes.
After having my door shape smooth and ready sculpting, I used the lift tool at various levels of strength to find the level of extrusion I was happy with. After trying 0.1 strength, I decided that was the amount of extrusion I was after and used it for the final design as follows.

Fitting the door in place in the cave entrance was the last thing I wanted to do for it, and this was once again a matter of resizing and making some slight sculpting adjustments so that the door was situated in the wall properly. This would mean that there were no gaps in the surrounding stone and makes the door look like it has a purpose within a slightly indented part of the cave as opposed to it just being placed there.
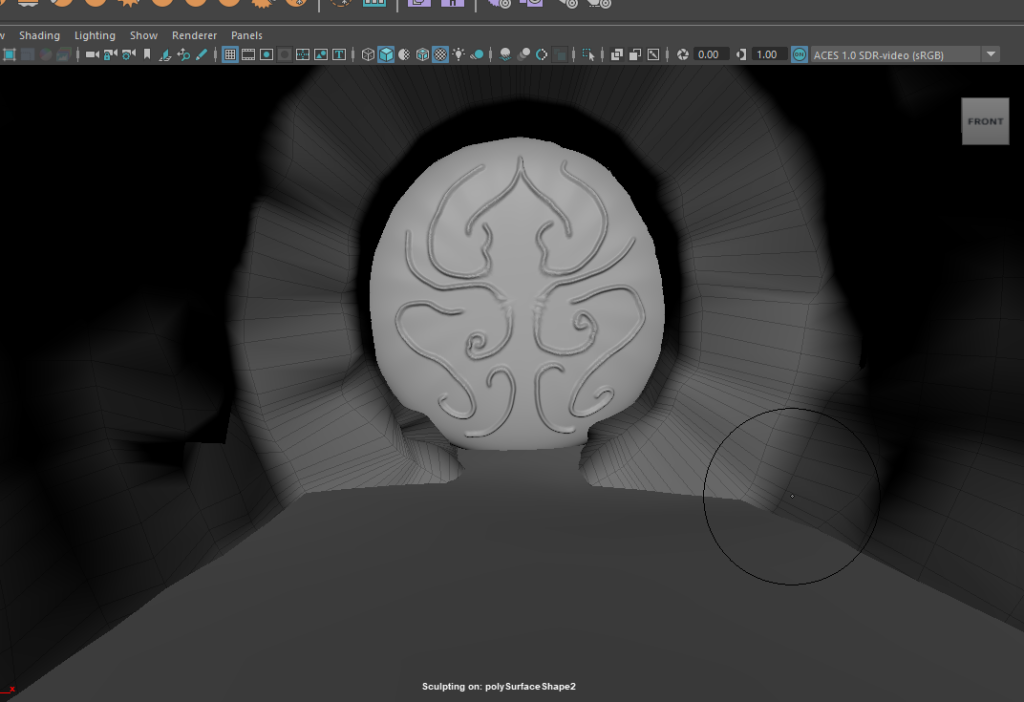
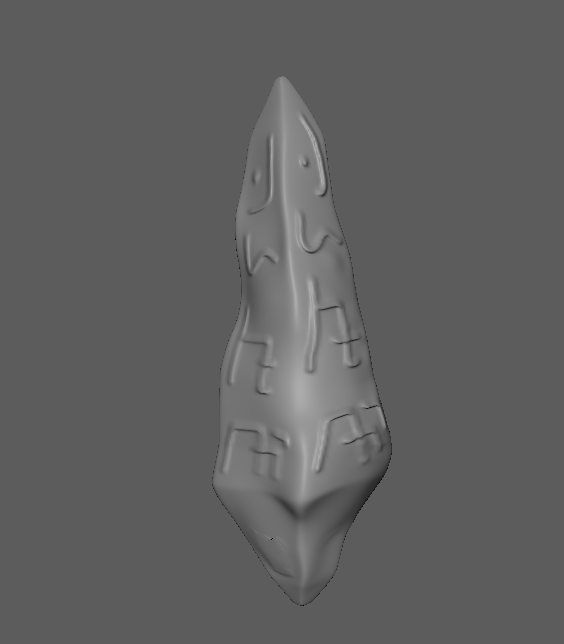
Creating the Scene – The Obelisk
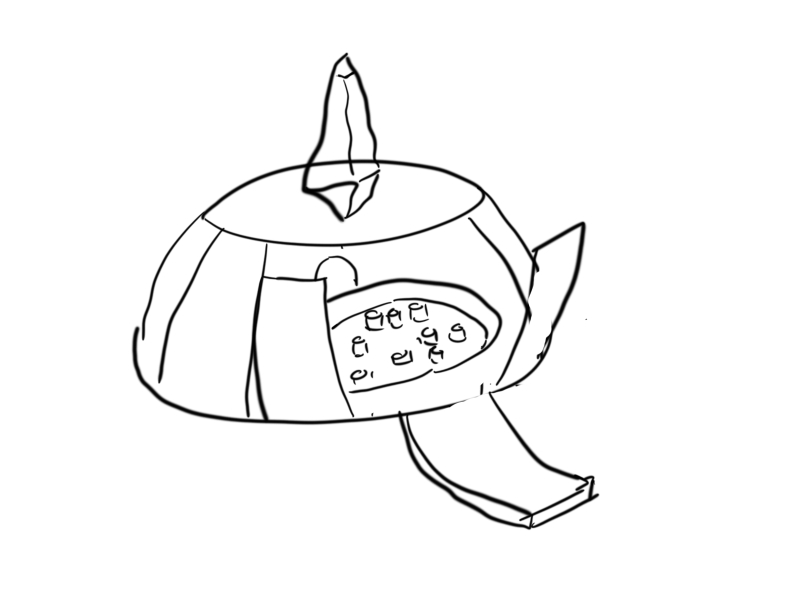
As the door opens, the user will step into a large dome shaped room that will be hoisting a large obelisk toward the sky. Seemingly inscribed with unfamiliar runes (just some lines I sketched in photoshop when doing the storyboard), it floats without apparent purpose and like nothing is holding it up but its will to be airborne.
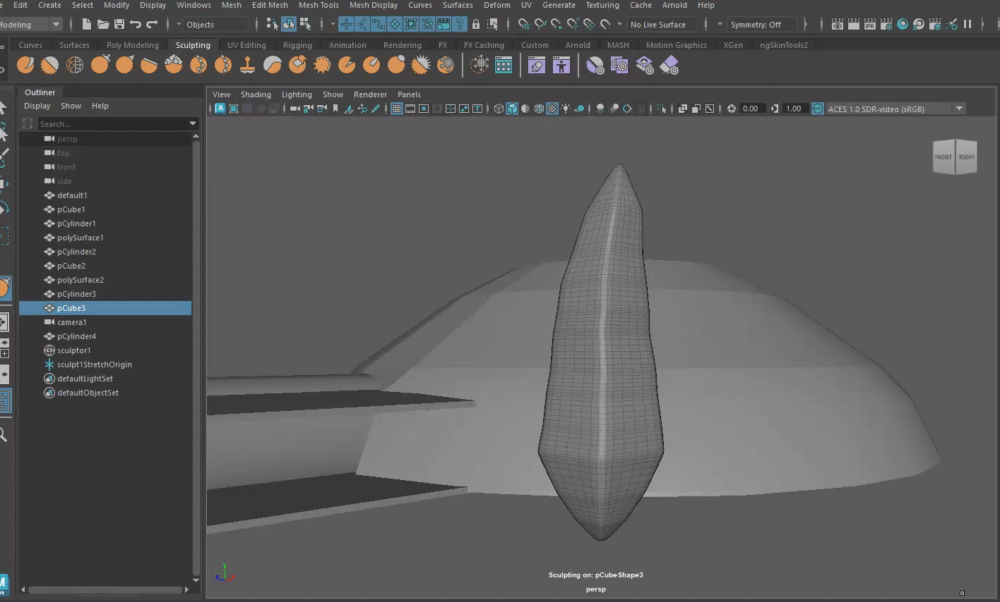
I started with a cube shape to create it, thinking that I would work from top to bottom with the extruding process. I formed the shape of its tip, then used Ctrl + E whenever I wanted to extrude the base down more.
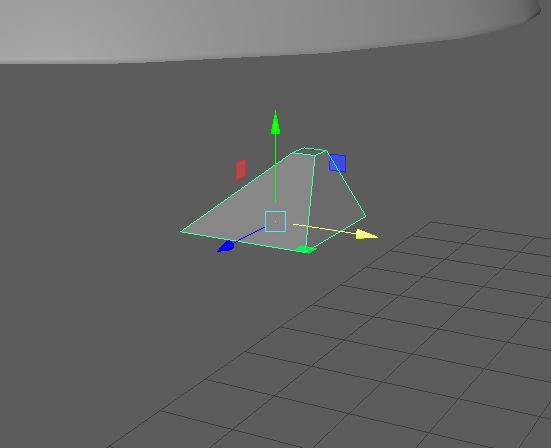
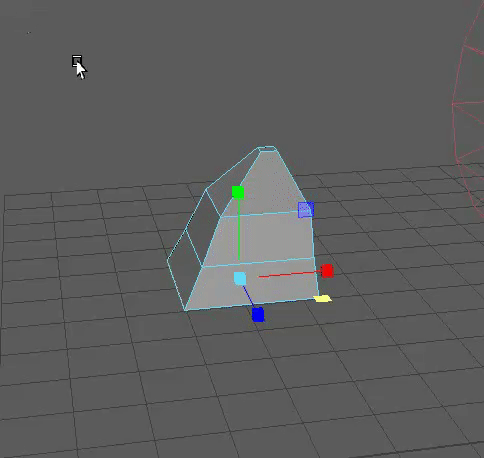
After going through all these different extrusions, I went specifically into edge edit mode and altered the position of some of the edges sporadically for a bit of initial definition before I used the smoothing tool on it.
Once I had the final shape, I made the decision to bevel the obelisk before smoothing it out. My thought behind this was that when It comes to the sculpting of the piece, having more faces around the edges would help it have a more dense effect when it came to using the lift tool.

Once it was smoothened enough for me to be satisfied with the proportion of the shape, I went back and used the grab tool to create those natural looking formations to make it seem like genuine rock.
And lastly, to really give the obelisk its otherworldly appearance, I once again used the lift tool (in a similar way to how I used it on the door) and created the runes. I tried to replicate some of the more composed looking runes I created on the storyboard and once IT was done I was ready to move onto the next step of the scene.
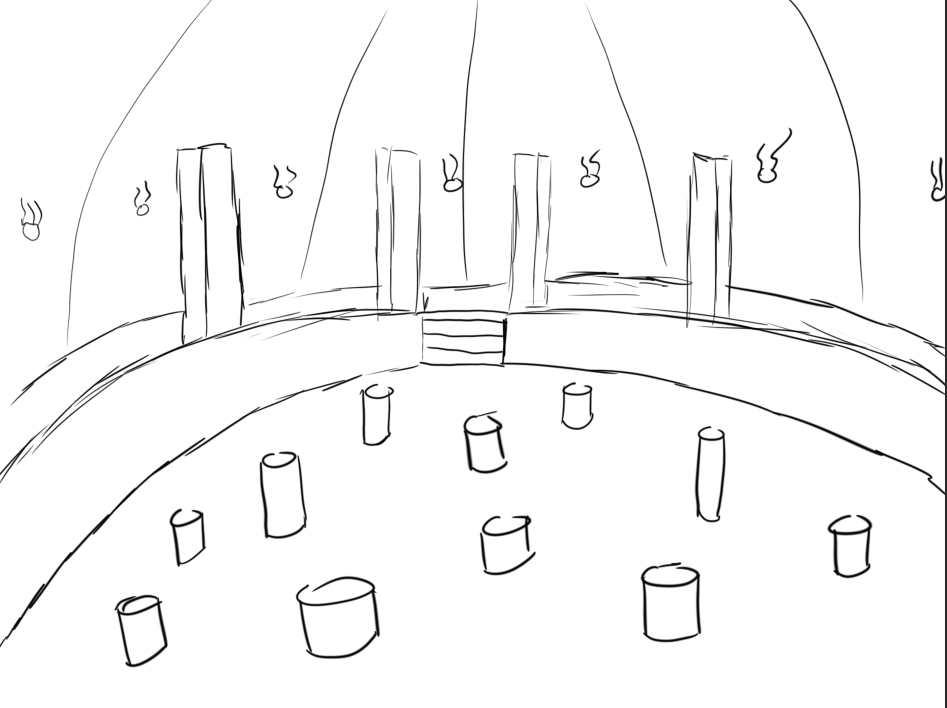
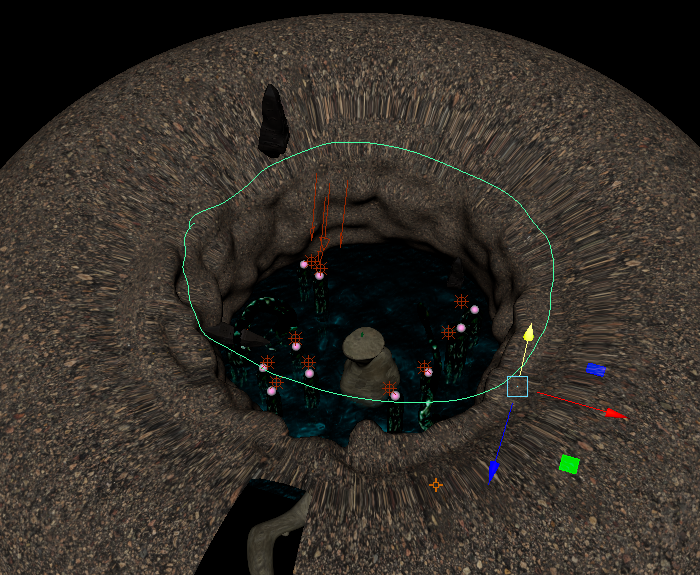
Creating the Scene – The Lair
When thinking how to go about making this room, I actually decided to deviate from the storyboard idea of just having a normal dome shaped room. This was due to a couple of main reasons. Mainly, that having a large open room to me seemed a bit too simple and could be less interactive than some other ideas I could come up with. I decided instead to have a small protruding island in the middle of a bed of water. When the user enters the room, after a short period of time, a bridge will rise out of the water allowing them to cross over.
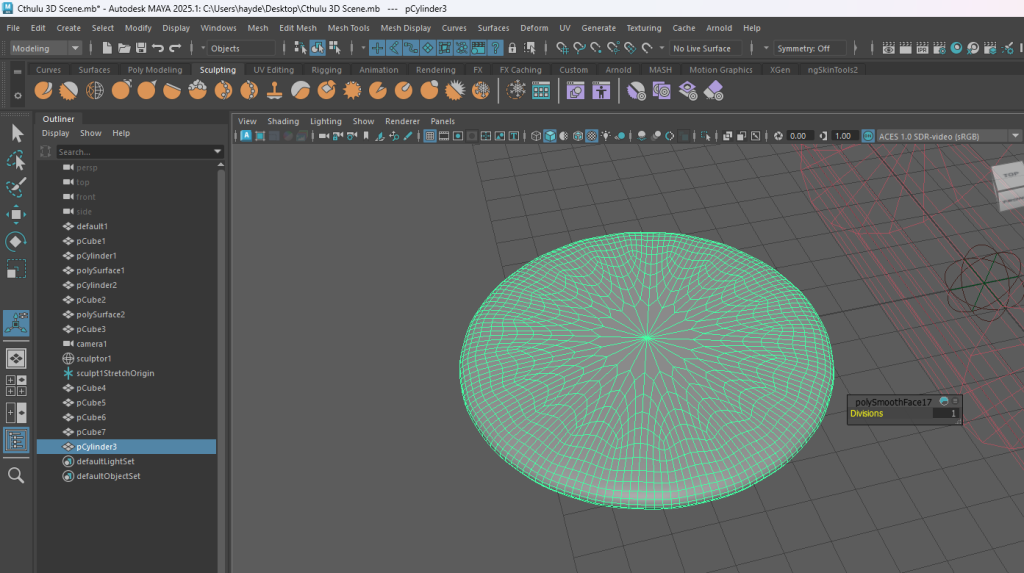
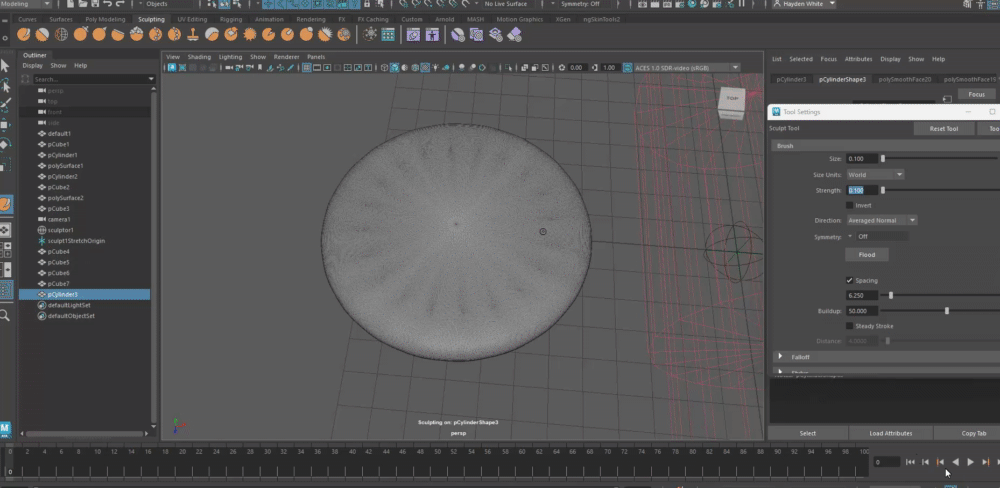
To start this, I created what I could be using for the centre rock and form the room around it. I wanted the spire to come out of the water with a quite distinct spiral shape to it, so I used a cylinder that I extruded upwards while rotating the faces. This helped create the base shape I was looking for and that I could take further with the sculpting tools available.
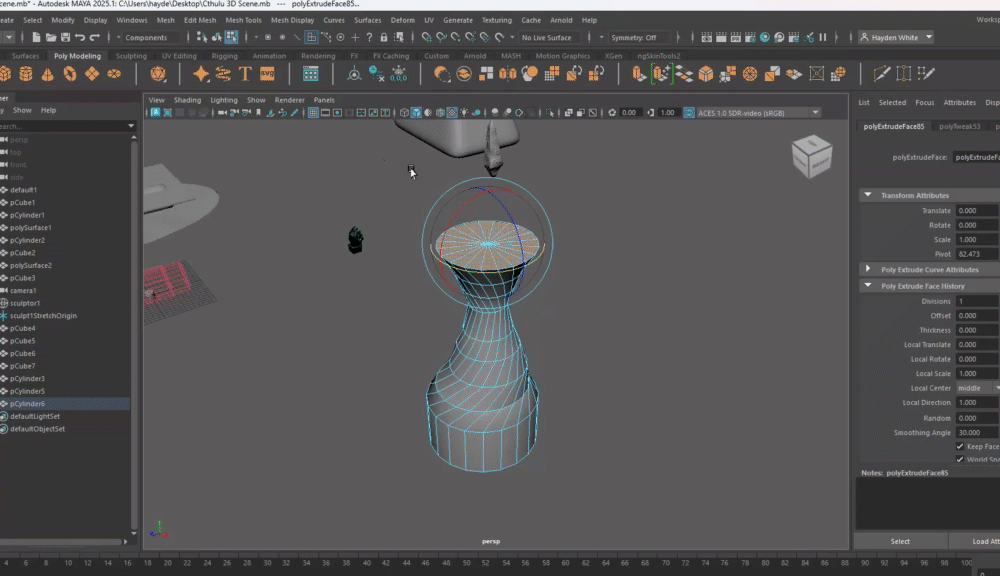
Whilst this is a good start to the spire, I did want to give it more of a naturally formed look to it, so I took the inflate tool and did just that. Once I had the shape I thought would work with the piece, I wanted to start working on the body of water by editing a poly plane object.
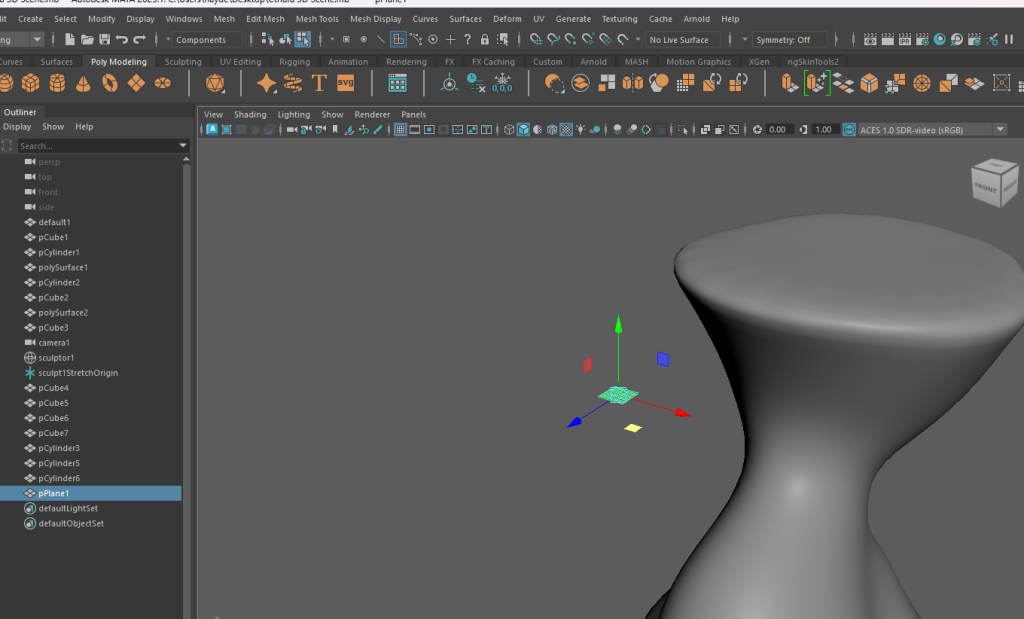
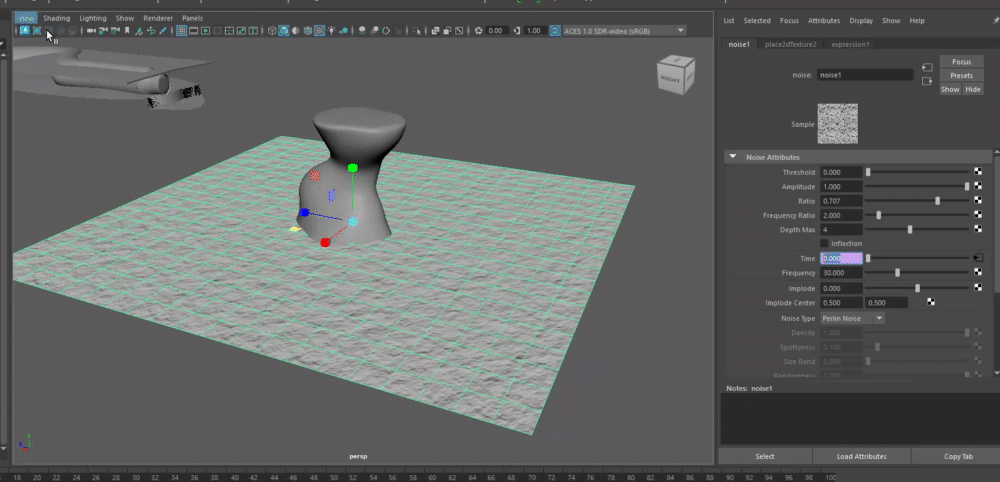
I assigned the plane a standard surface material and then used the resize and smooth tools to cover the area I think necessary for the cave interior. From there I could look to edit the finish of the of the plane accordingly to get the animated finish of water below the user.
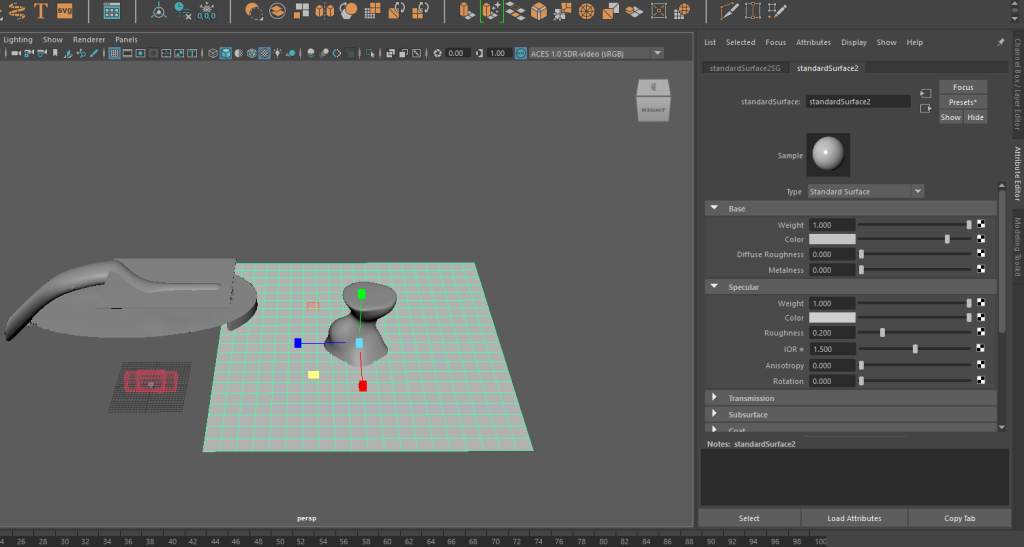
Depending on how deep the cave is, a spring will normally consist of still water. This is due to a lack of outside elements such as breeze or wildlife. However, I wanted to create an animated finish to the surface to almost give a feeling that something is lurking down below, and so I made sure that the blur mapping of the plane was set to a noise image. Using this makes for a perfect rough water finish.
Only having used this type of animated plane in one or two projects previously, I was not extremely experienced as to which settings would be the best for it straight away. So I decided to do some experimentation, and found that the following settings would be ideal for the effect I as attempting to create.
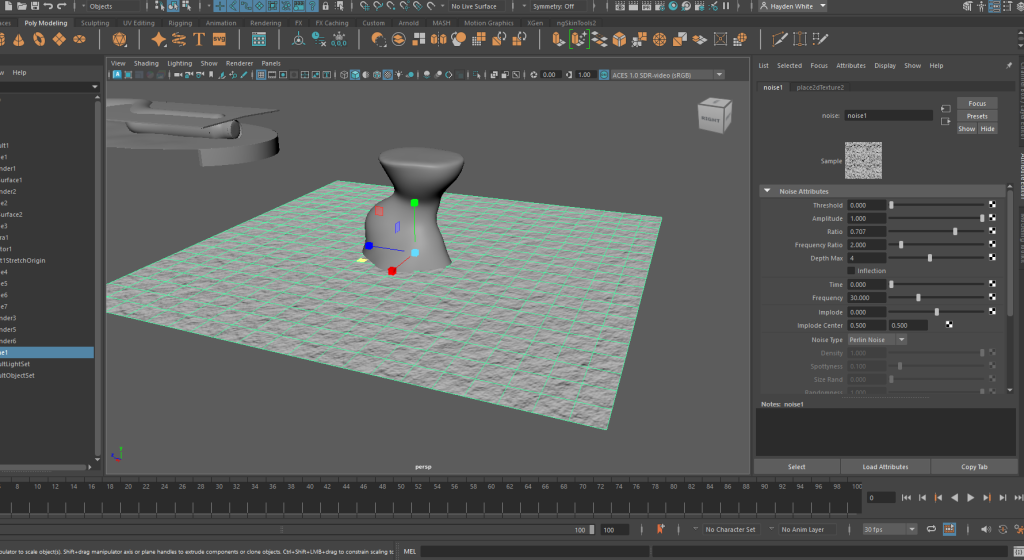
To get the water flowing and create the animation, I used an input that I was familiar with to create a constant water flow effect rather than have to move it around every other frame. This input =frame/x was used as a value for the time slider on the editor and creates a really nice animation. For the value x, I used 50 for the desired speed.
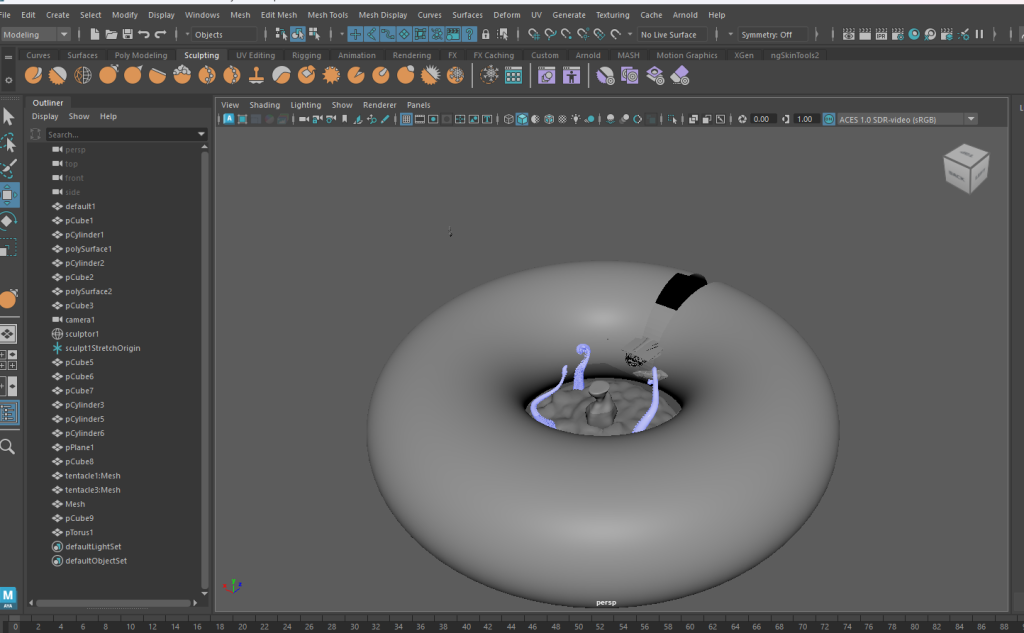
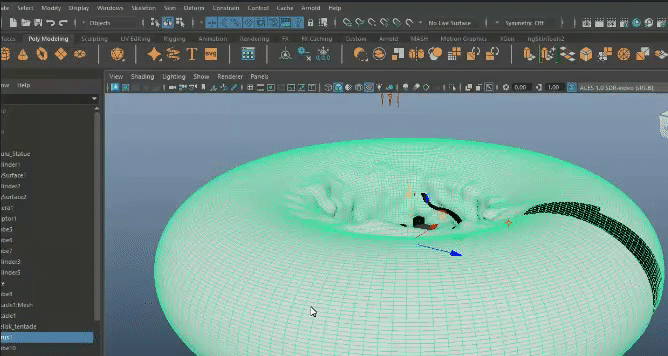
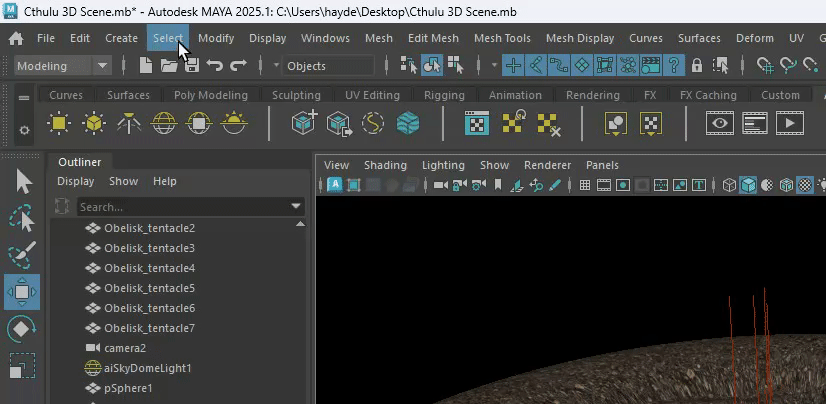
Lastly, I just edited the colour of the plane so it was a cold blue colour. After this plane was edited in this fashion I raced on and created the walls of the cave I intended to use. To get this made I used a torus polygon which I smoothened out the surface, creating more faces to ensure it was ready for texturing. Then once again using the pull and inflate tools I created both a floor (from an enlarged Once the walls were made, I started to import some assets that I found online, being some large tentacles and a statue of Cthulhu.
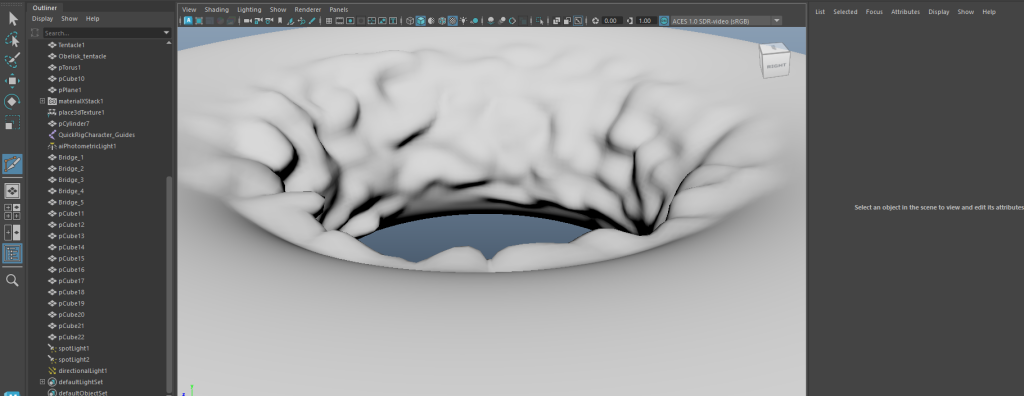
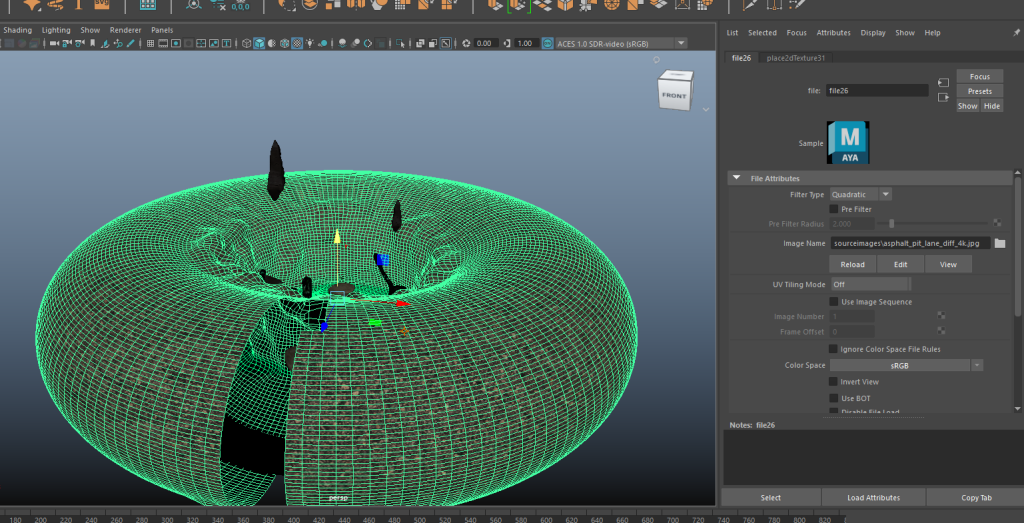
Getting the texture I wanted on the objects was (mostly) a fairly straight forward process. I selected the torus in object mode, held right click and chose to assign the a new material to the shape. Choosing a lambert material for this would be perfect as it would help create a nice matte finish and not have any exceptional highlights reflected in the lights.
Once the lambert was applied, I could then swap out the colour in the attribute editor and choose to use a file that would paint the surface as the contained texture. I then I chose to use the spherical UV Mapping tool to ensure that the objects in this scene all had smooth finishes on them and were not stretching too much. However, this actually resulted in some texture stretching towards the top of the cylinder that I actually thought could be used as a reality warping effect almost which is fitting with the theme of the piece.
Animation & Post Production
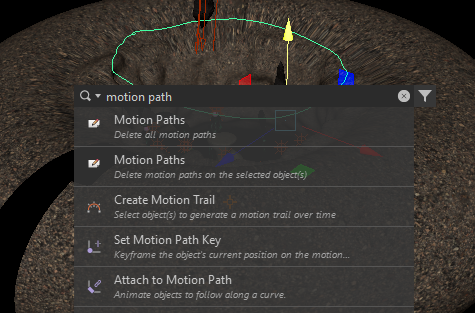
When it came to the post production, I had to think about what I want actually happening in the scene. One of the major things I wanted for this was to have two floating obelisks take a circle path around opposite each other over the camera. I could have key framed this all the way around but I thought that using a motion path would be much more practical.
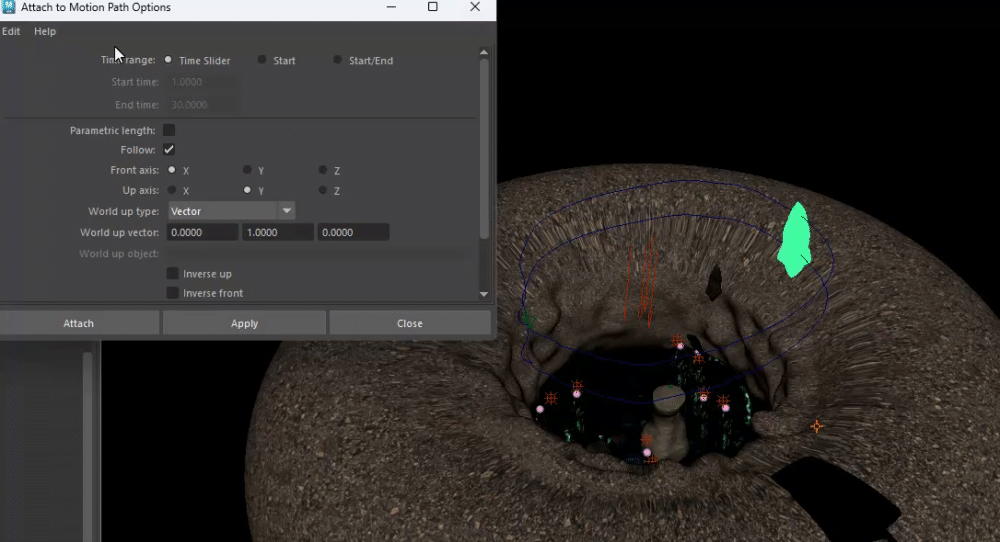
I started by drawing the path out that I wanted the obelisk to move, and then I could look to edit its trajectory from there.
At this point, I can select both the obelisk and the curve and use the attach to motion path tool. This will allow me to edit its start and end points accordingly.
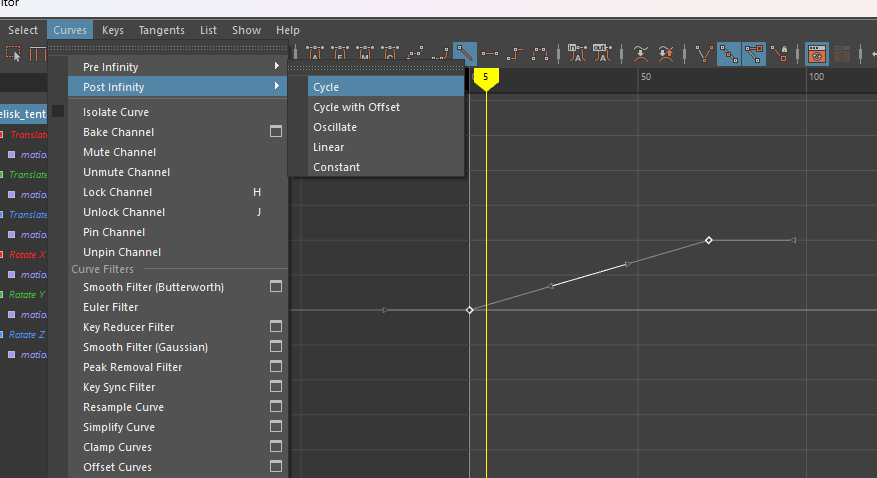
I noticed that with the path its taking, when it gets to the origin point, the shape starts to accelerate when passing and decelerate when approaching. With this being extremely clunky in practice, I decided I would go to the graph view and create a linear speed that way.
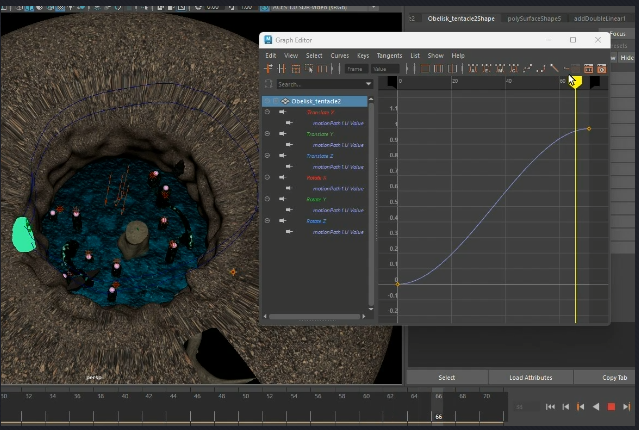
Once the animation was at a linear speed, I could then set it to cycle infinitely by using the post infinity option in the graph editor, under the curve tab.
This process was repeated for the second obelisk, and the other airborne objects that appear in the scene to save time on keyframing. Keyframing is still used with these objects between the first and last frame of the original animation to show a rotation in the object as it moves along the motion path.
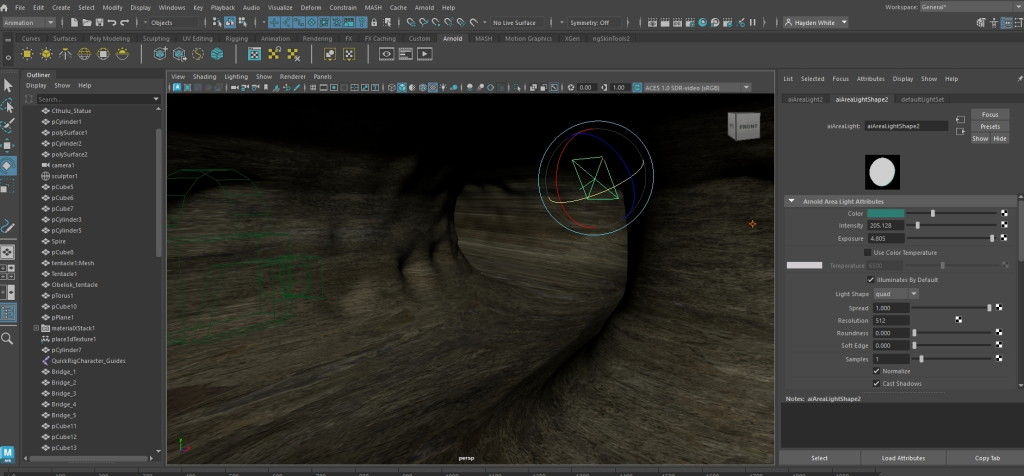
I started to add some lights to the darker areas of the scene, mainly the tunnel and certain parts of the open area past the cave. This was done using a variety of spot lights, area lights, directional lights and even just using certain shapes with a blinn surface to give some objects more definition.
At this point with the post production, I got into a sort of flow state and ended up doing most of the work without stopping to document thoroughly. But to summarise, I added some rock shapes that will be using the same motion path method as some background shape movement, objects that needed to move such as the bridge and the Cthulu statue were done simply by using Keyframes and making slight adjustments to the positioning of the shape I was giving some life.
Rendering the Scene
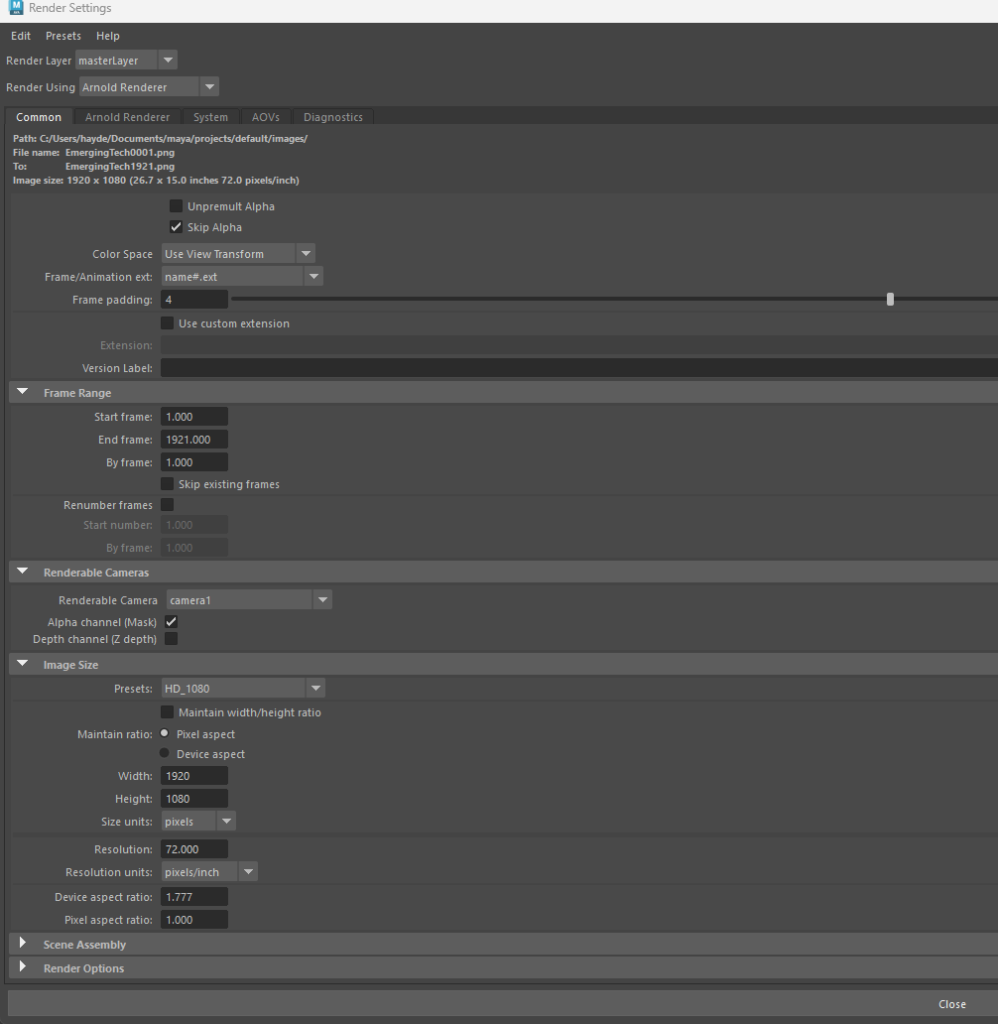
The final stage of creating the production was the render, but before I could press the final button I had to make sure my settings were all configured properly. So I ensured that the viewpoint used was the camera object that would be moving throughout the piece, and that it was the right resolution and amount of frames that I needed for the piece.
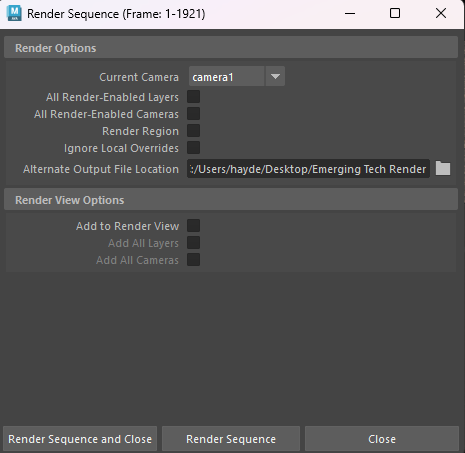
With the settings configured, it was time to render the scene. Using a render sequence to convert the production into .png files, I began creating the final product into a new folder.
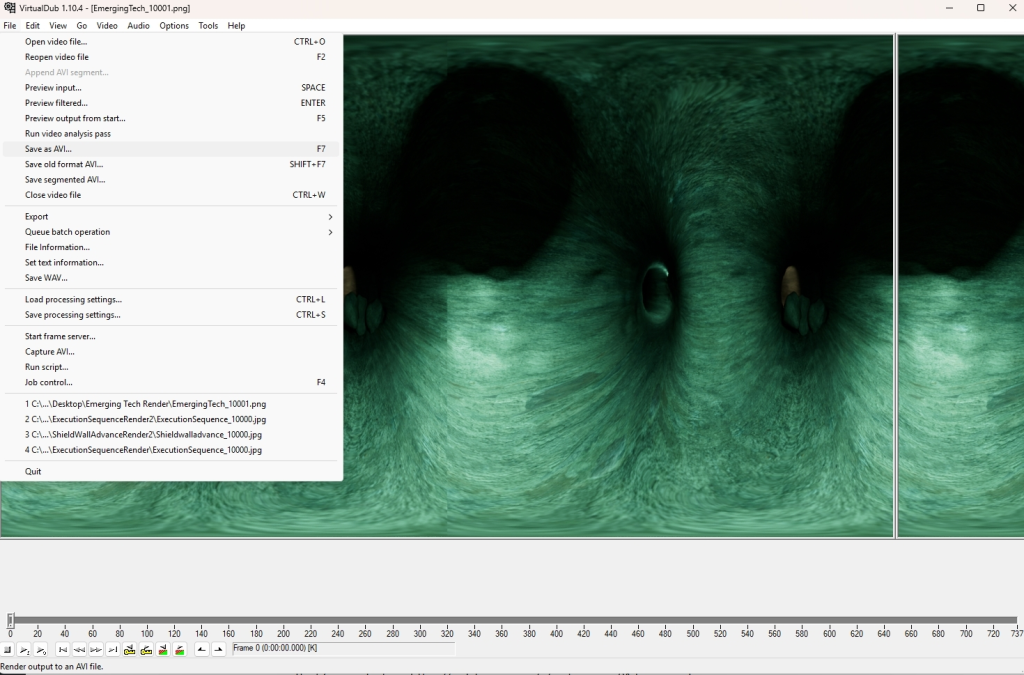
Using an application called Virtual Dub, I was able to bring all of the frames from the final render together into an AVI file and upload it to a private YouTube link. The embed for the link is below for you to watch.
Final Project Showcases
References
Coulthart, J. 2021, Resurrecting R’lyeh, https://www.johncoulthart.com/feuilleton/2021/11/08/resurrecting-rlyeh/ [accessed 10/01/2025]
Assets
Cthulu Statue & Included Textures: https://sketchfab.com/3d-models/mikes-cthulhu-statue-version-1-91bb6987d4c74ed4a45f4a551f6b5932
Plastered Stone Wall Texture: https://polyhaven.com/a/plastered_stone_wall [accessed 11/01/2025]
Rust Coarse Texture: https://polyhaven.com/a/rust_coarse_01 [ accessed 11/01/2025]
Starry Sky Texture: https://www.deviantart.com/kirriaa/art/Free-star-sky-HDRI-spherical-map-719281328 [accessed 12/01/25]
Tentacle Model: https://sketchfab.com/3d-models/tentacle-rigged-8fcc783af94246a0b8febf424a4b96b9#download